Today I Learned: When calling one GitHub workflow from another you have to explicitly state the called workflow should inherit all ENV variables otherwise it won’t have any access to them.
Today I Learned: When calling one GitHub workflow from another you have to explicitly state the called workflow should inherit all ENV variables otherwise it won’t have any access to them.
Saguaros are in bloom in the San Tan Valley.

Step J is complete!

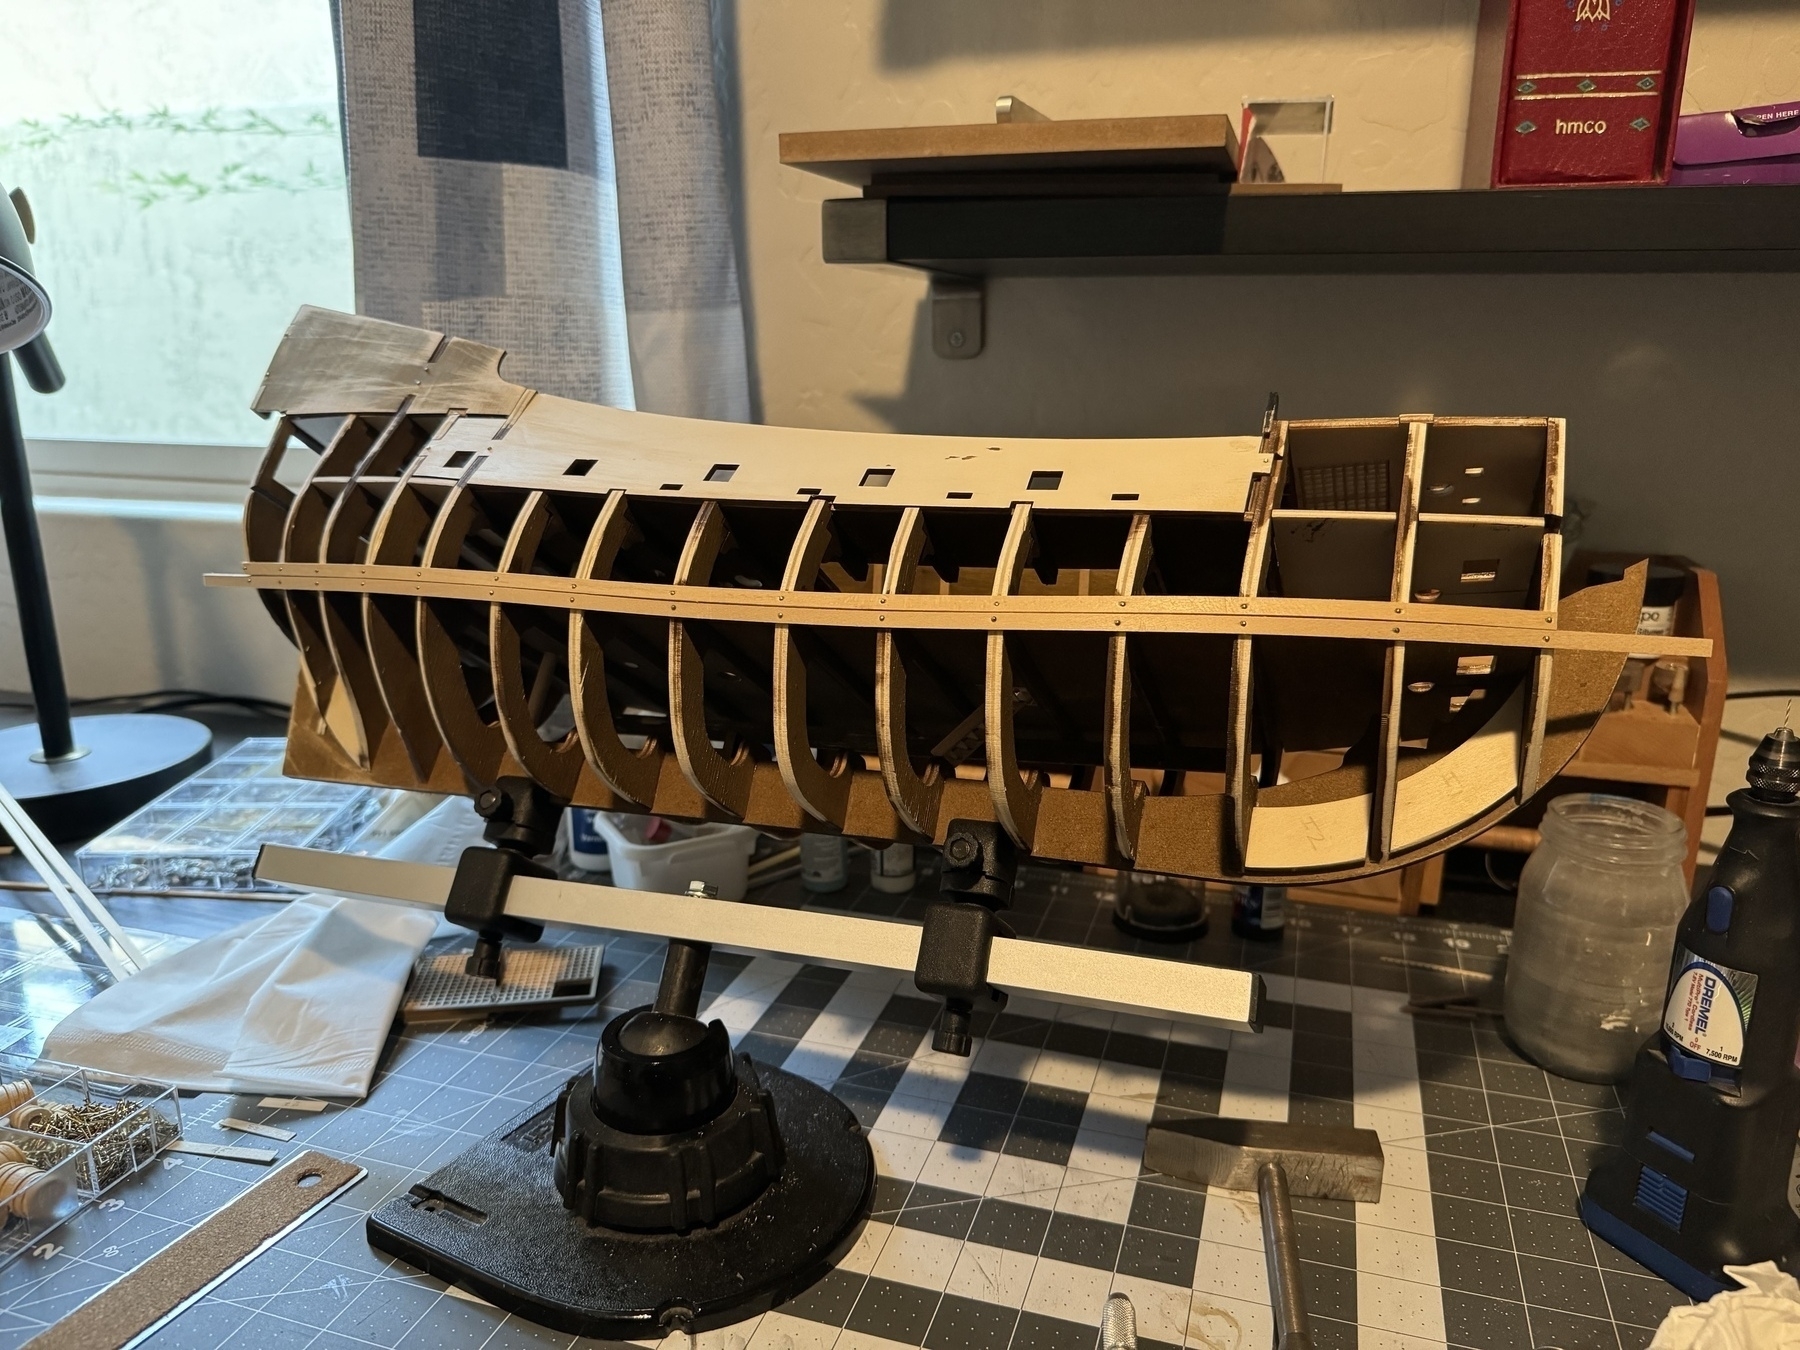
Yes, it’s supposed to be missing a bunch of planks. That’s actually the point of this model is that this entire side has a big old hole in it showing you the interior where you’ll see cannons, and supplies and stuff and it will even have LIGHTING! That’s going to be fun. Coming along. In Step K, I’ll be finishing up just about all the planking on the starboard side here.
JIm
Starting planking! #flyingdutchman #modelship #modelshipbuilding
Step I is complete.
Part of Step I was finishing and putting the doors on the ship. I showed you that before. The rest of this step was to sand down the bulkheads in preparation for planking the hull.


The idea here is you want the planks to be able to lie flush on the bulkheads so the glue has better purchase and the hull has a smooth, curvy shape. So I spent some time with a sanding block sanding and shaping. Looks alright. May need to fill in some parts later as well. That’s really it for Step I. Next step, Step J, I start planking!! That, and the next few steps will take a while.
I finally decided to start using hashtags (I’m such a social media noob) #flyingdutchman #modelship #modelshipbuilding so maybe I’ll find and meet some folks. If you stumbled across this post on social media, head off to my blog at jimdab.com and go to the archives to see all my posts related to this build and my previous build of the Bluenose.
Take care all,
JIm
And I was able to finish Step H as well!
After getting the mahogany from Australia, I was able to finish outlining the grates that go on the deck. Step H, you may recall involved building that deck house and attaching the grates to the ship.

Here is the grating on the fore upper deck (oh, and my toes in the distance)

Next is the grating in the mid-ships. Those large holes in the corners are where ladders/stairs will go later. Those y-shaped pieces will hold a small row-boat. You can kind of make out the eye-bolts on the corners. That’s where the boat will be tied down. This part isn’t glued down yet, it just has some flanges on the bottom to hold it in place. This will let me remove it later to add stuff like cannons to the lower deck.

And finally, the aft-upper deck where the final grate went right up by the deck house installed earlier.
And that’s it. I’m now on to finishing up Step I which primarily involves me sanding and shaping the hull in preparation for planking.
Stay tuned!
JIm
Step G is complete—Finally!
I got my wood! It arrived last week and I’ve been able to get going again, catching up on my steps.

To finish up Step G I outlined each of my grates in the mahogany. I liked making that big one up top. It turned out real nice. Then I varnished them and that completed Step G.
Next up, Step H.
JIm
I’m in a bit of a weird state right now with the Flying Dutchman build.
In Step G, I needed to build some grates like this:

I’m supposed to outline each one in mahogany like the one in the bottom-right. But, the kit didn’t include enough to do that so I had to order some. Despite the company I ordered from saying they were in the US, my wood is coming from Australia.
So I moved ahead to Step H. In that step, I needed to build a small deck housing and install the grates on the deck. Well, OK, I can build the deck house. It looks like this:

Cute, isn’t it?
So that was about as far as I could go on Step H, so let’s look at Step I. In that one, I have to build some doors!

Here they are in progress. And then I glued them all on.

Here they are in the fore of the ship.

And a couple in the aft. And you can see I installed the deck house as well. Those big holes in the deck are where the grates will go.
Now it’s pretty much down to sanding and shaping the hull in preparation for planking. That’ll be Steps J, K, L, and M. So I’m stalled a bit right now. Once my mahogany arrives I can finish the grates, install them and that’ll pretty much complete Steps G, H, and I. The good news is, the wood arrived in the country and is just awaiting clearance through customs. Hopefully I’ll have them by the end of the week and can continue forward.
Until then, take care,
JIm
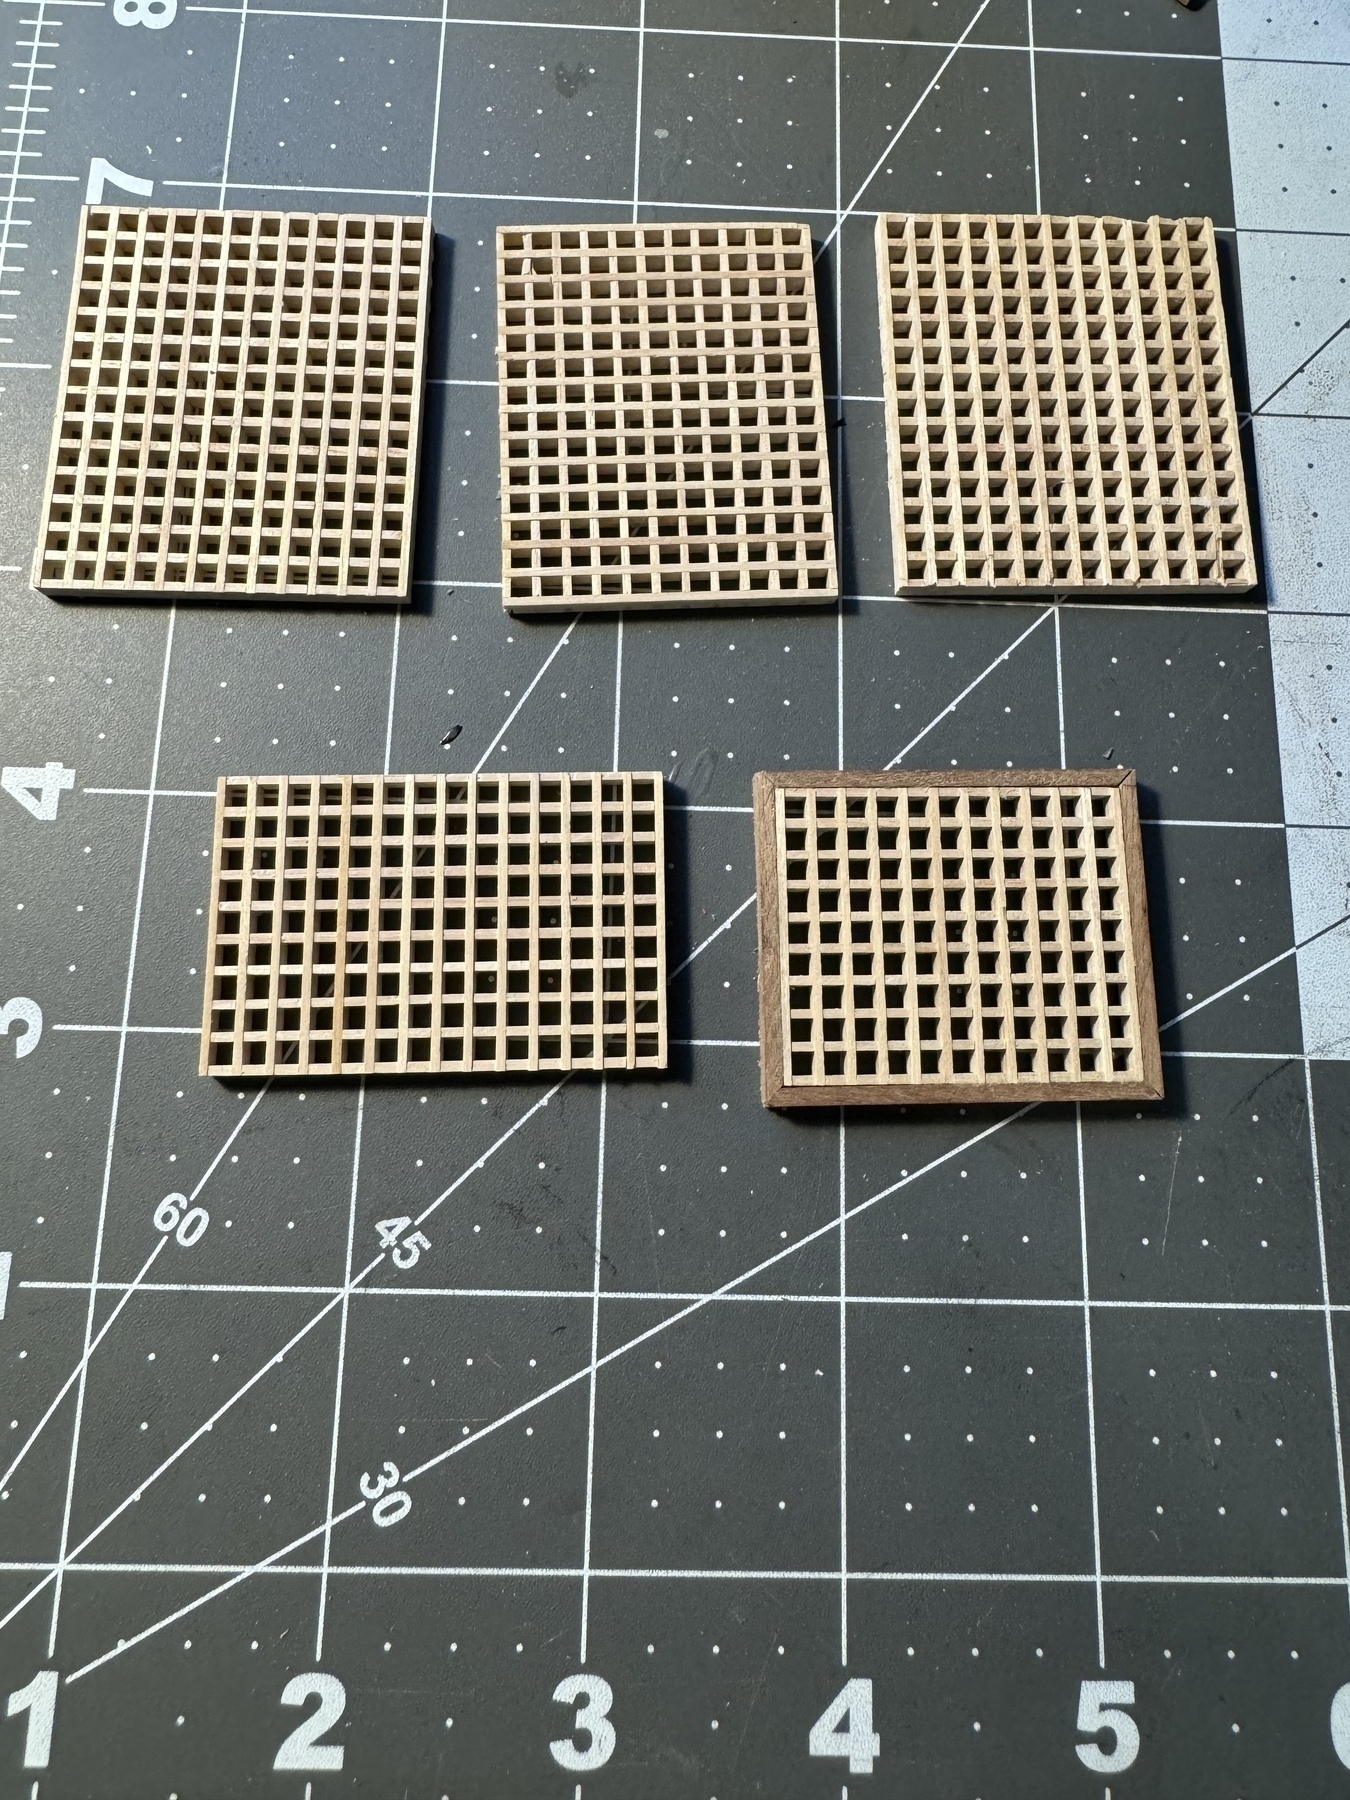
I made these five grates for step G. Now I’m supposed to frame each one in mahogany like that one there but I didn’t get enough in the kit to do that. 🫤 So I ordered some more. I’ll probably move on to Step H in the meanwhile.
Step F is complete!
Wow, some of these steps go by quickly.

Next up, in Step G, I get to build lots and lots of grates. Should be interesting.
Here is a sneak preview of all the little bits I get to put on this model. This is fun.

Those barrels will go in the bottom of the ship. That big old Flying Dutchman figurehead on the front and lots of bones that go on all over the place.
JIm