Step U is complete!
This step was pretty much all about gluing things onto the ship I mostly built earlier. Recall Step R where I had to make a bunch of things and did nothing with them, well in this step I got to add all those things and more to the ship.
First I had to build a bunch of ladders? Stairs? Something. Seven of them to be exact. They were kinda fiddly, so I made a jig to help hold all the pieces in place as I was building them.
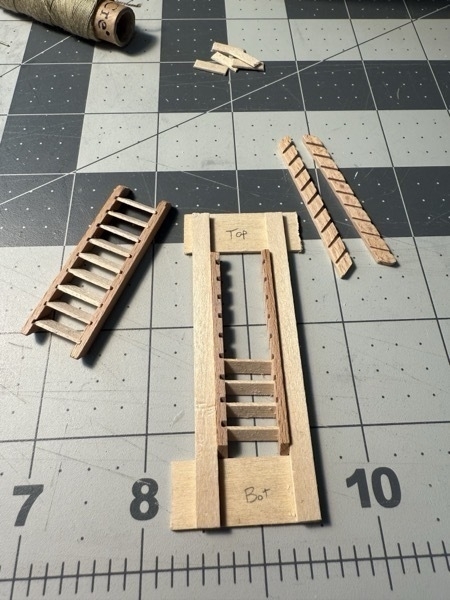
Here you can see one completed one, and one in progress. At the top of the picture are the treads, and in the upper right are the pre-cut risers I guess you’d call them. Thank goodness those were pre-made.
Here you can see three of the seven I had to build all in place where they belong.
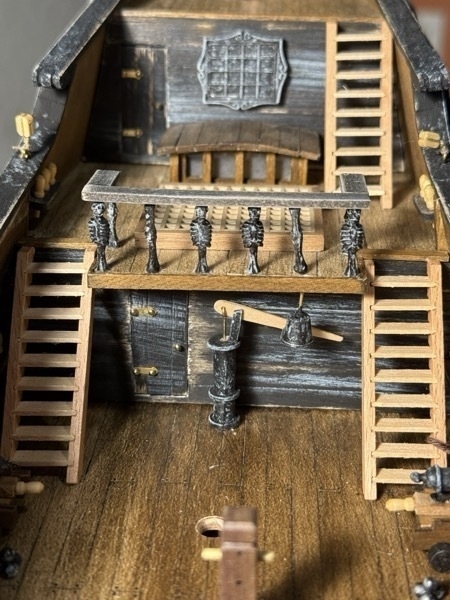
I also glued down the bilge pump there in the middle and the bell hanging from the overhang. Above all that is another rail I built with more of the skeleton bodies and bones for balusters.
Then here you can see my nice little cannons have been provided with little piles of cannon balls.
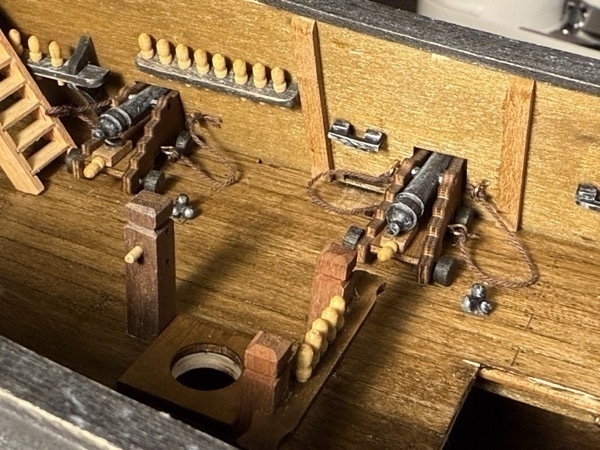
Also shown here are several of the belaying pin racks I’ll be using later to tie off some of the rigging. To be honest, I’m a tad bit concerned. Most of these rails had pre-drilled holes, but those pins are pretty darn close together. I’m not entirely sure how easy it will be to tie rigging lines around them. I guess I ‘ll find out.
Then up in the bow of the ship I mounted and hung the anchors.
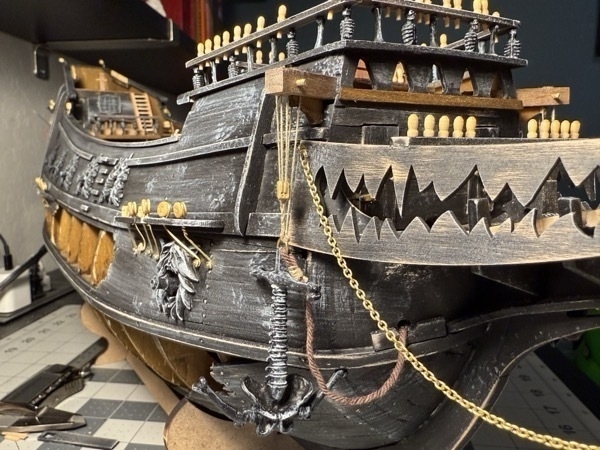
There is one on the starboard side too. Here you can also catch a glimpse of some additional belaying pin rails and other rails I had to build on the forecastle (I think that’s the right word.) Also, notice the big chains hanging down...
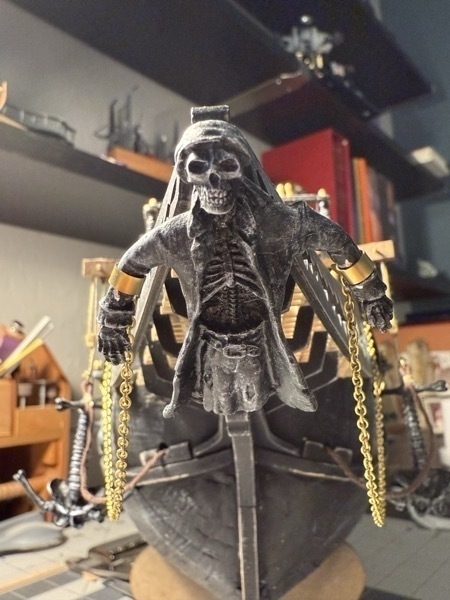
Those go to the figurehead mounted right up at the prow. I think that’s really cool looking!
Finally, here is a view of the front of the ship showing the additional rail and skeletons and bones and belaying pins I had to install along with two more of the ladders I built. For those keeping count, the remaining two will go inside the grating that will support the little skiff to allow access to the lower deck. You’ll see that later.
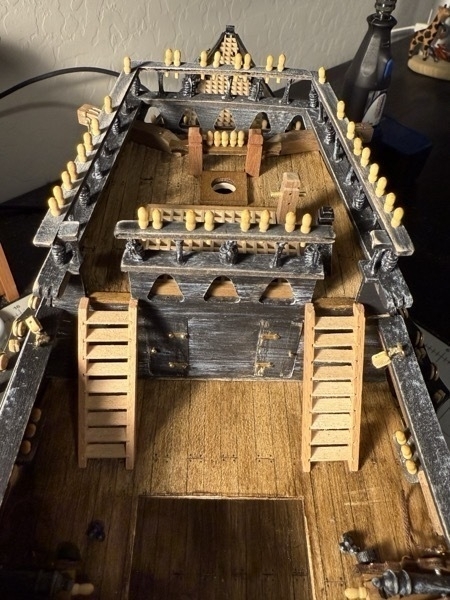
And that’s it! That competes Step U.
Next up I need to take a small detour and complete Step U.5. Recall way back when when I had to build the lighting to go in the lower deck and was stalled for a while because I didn’t like the material that came with the kit and figured I could find other lighting that would look better? That all worked out fine, but I have additional lighting that has to be installed on the sides of the stern and I still have a bit of a wiring mess to clean up.
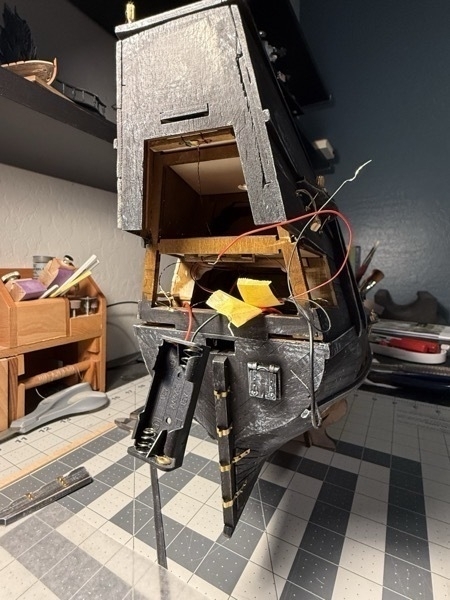
This is what that all looks like. I need to finally do some soldering and finish getting all that wiring cleaned up and then add support for the lanterns that will be installed in Step W. In fact, I’ll probably just mount them now. I’m going to call all this cleanup Step U.5, and then continue on with Step V which is building a bunch of stuff that goes into the hold of the ship and mounting the cannons on the lower deck.
Stay Tuned!
JIm