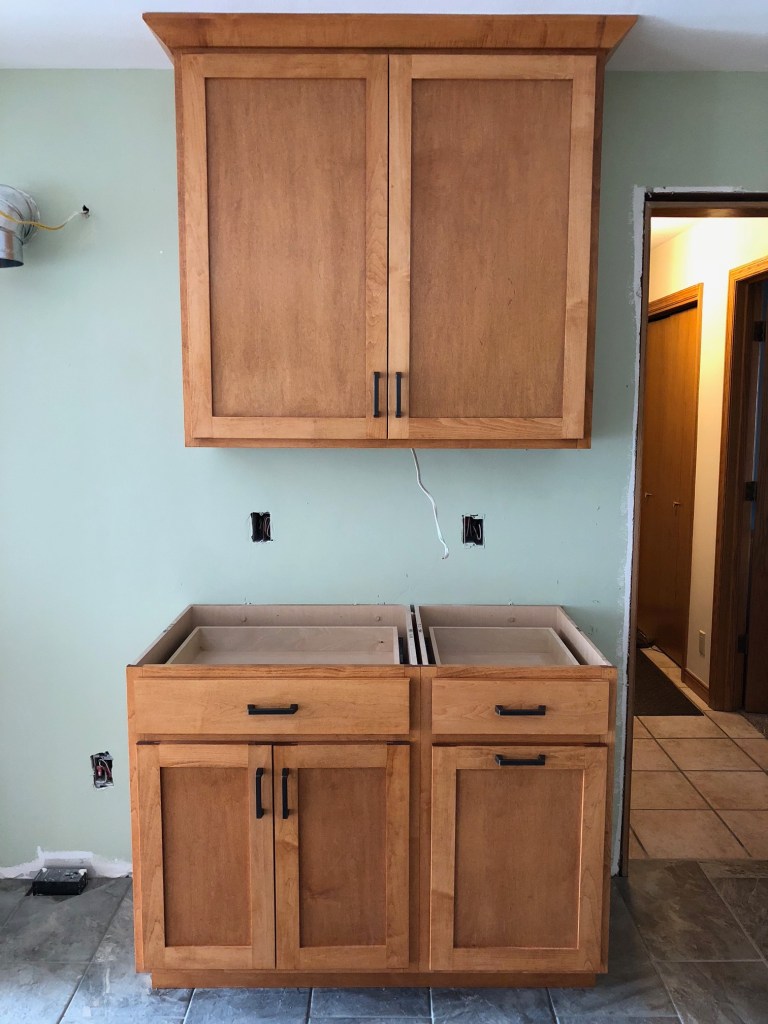
Back to being clever (or so I think). Looks like cabinet folks spent the day putting some handles on our cabinets. We really like them.
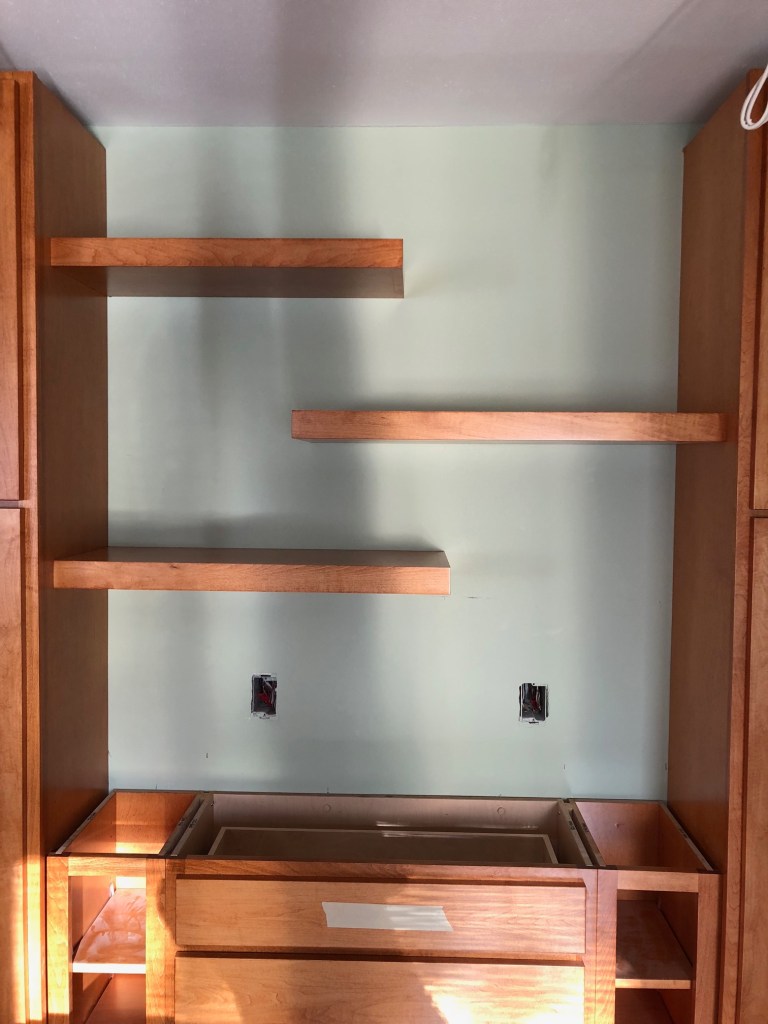
And here we have our floating shelves. Those too turned out super nice.
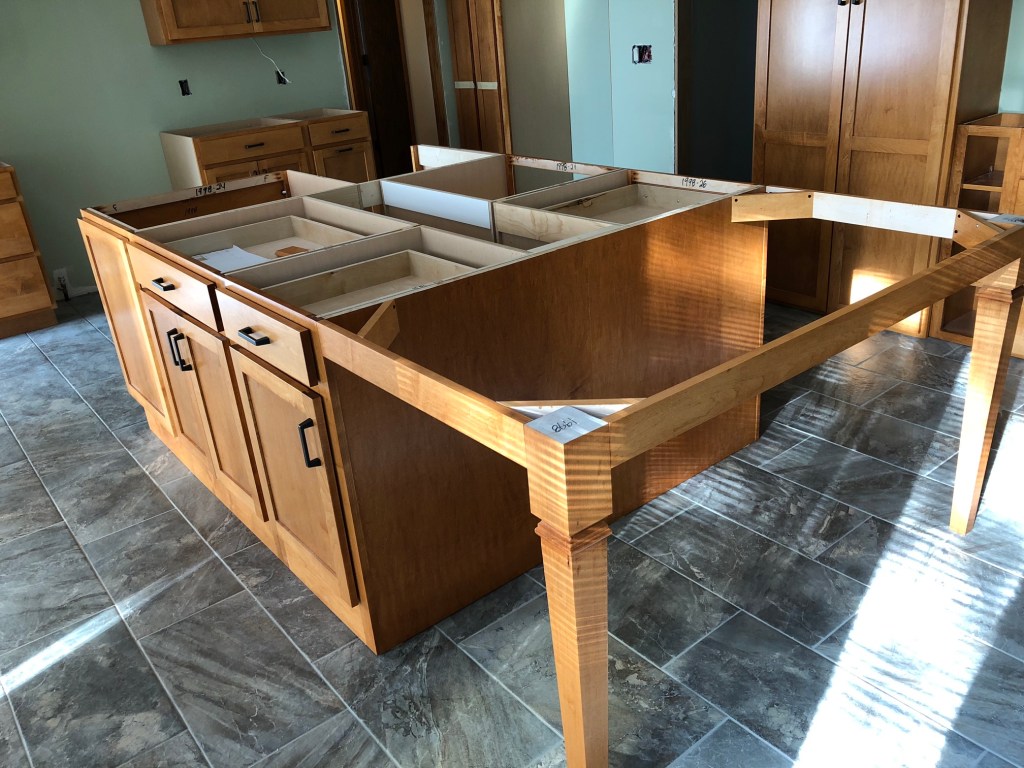
And finally, they have the outline of the table built. Love the legs we picked out.
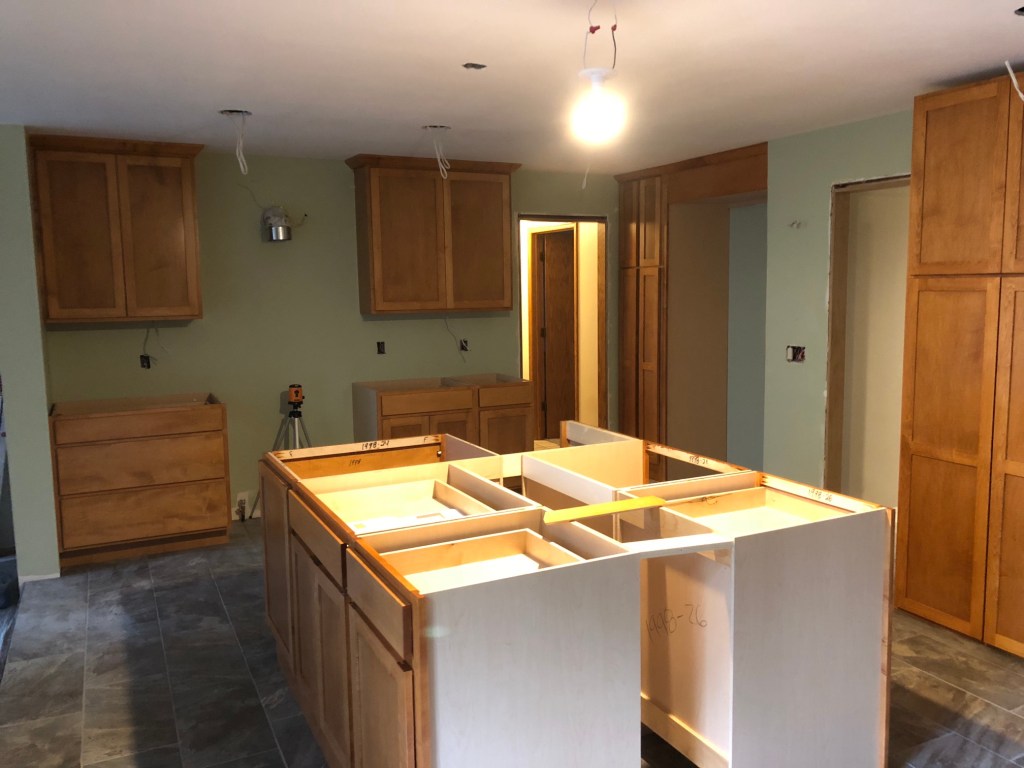
Now we’re gonna have our first, change our mind and it’s gonna cost us, moment. We think the island is too short. That there is 9 feet long (or thereabouts). Our intention is for 4 people to sit in this area, one on each side and 2 on the end. That will work with what’s there, but if people are on the sides and the end, we think knees will be bumping. Probably not too bad, but we don’t want to feel cramped. We have the room, so we’re gonna ask them to re-do that portion and lengthen it out to 10 feet. This will give people on the sides plenty of room. Now I get to compose the email to the contractor.
That’s it. That was a nice anniversary present to us. Now we get to go out to dinner. Eating out at Clara Bo in Beloit, WI.
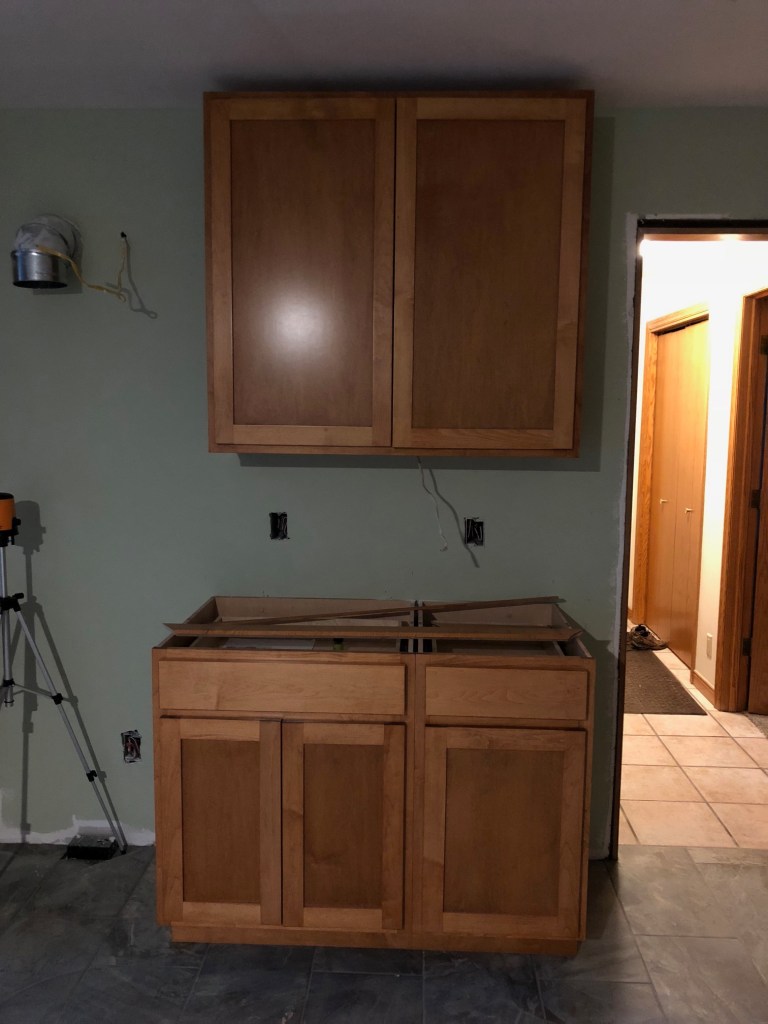
Yeah, no clever titles this time. Not feeling it. Got home yesterday and saw cabinets in the kitchen.
I gotta say, they look nice and this is starting to look like a kitchen.
This is where the range and range hood will go. We’re going to have white subway tile as a backsplash between the upper and lowers with an accent strip somewhere along there.
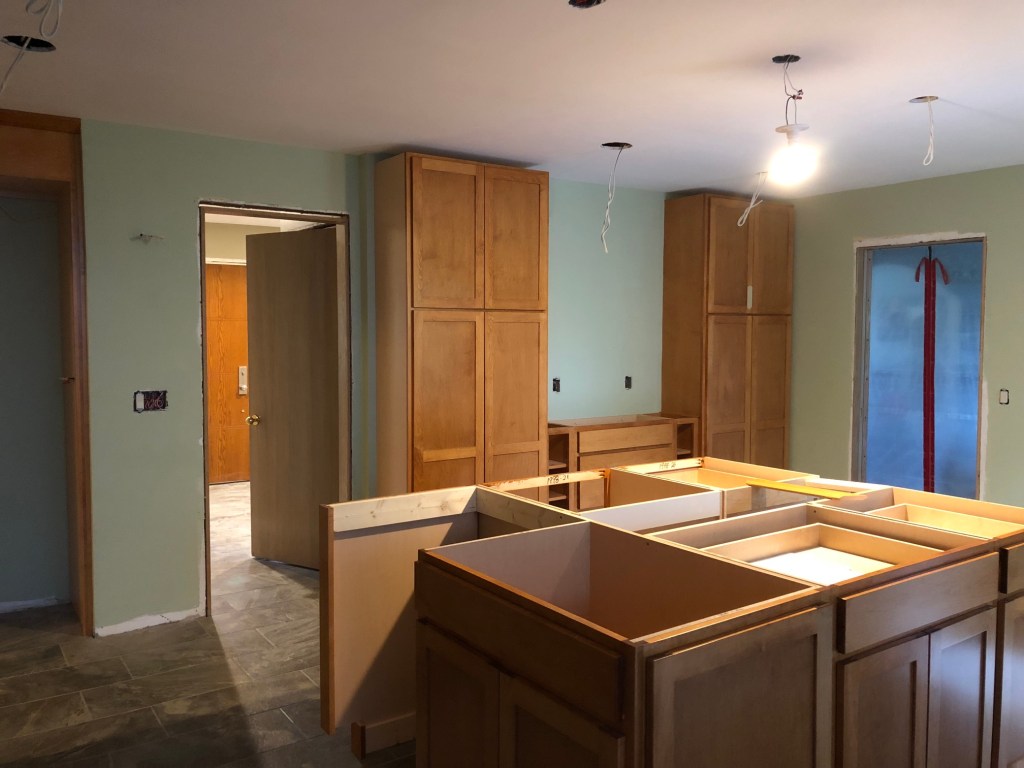
This is the view of the island and the cabinet wall (for lack of a better term. On that wall between the cabinets will be three floating shelves. Sink and dishwasher here up in the front of the picture.
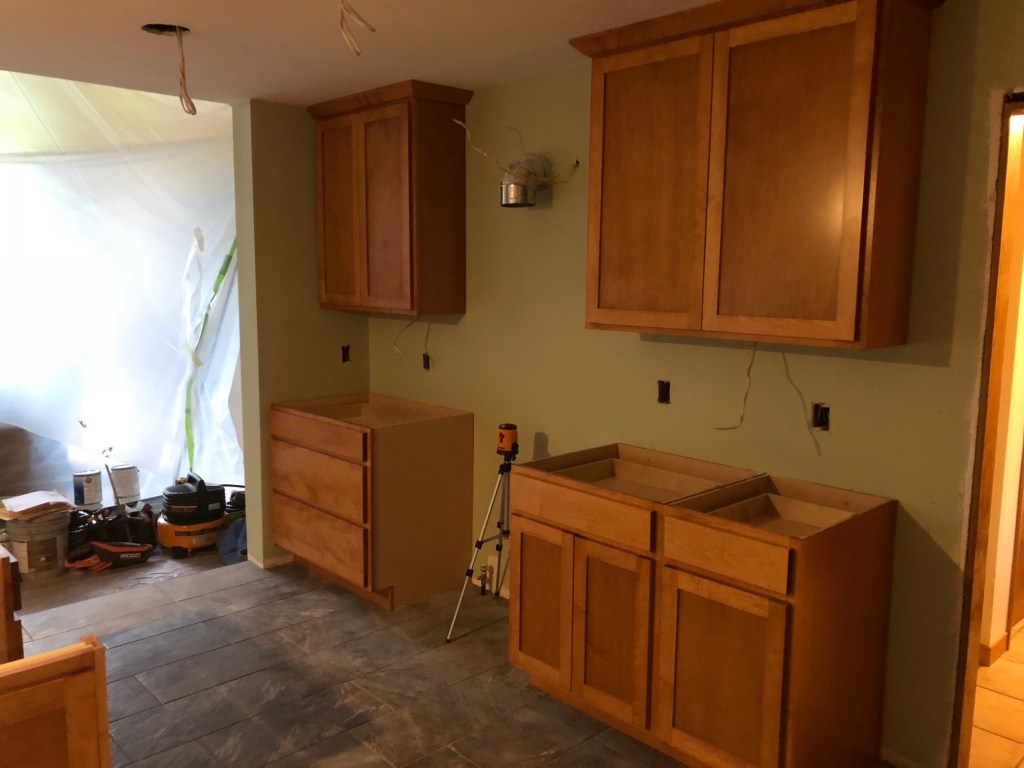
And then another view of the kitchen back toward the range. The refrigerator will go in that opening to the right. The cabinets next to that are pull-out pantry-style cabinets. Those will be nice. On this end of the island the countertop will extend out a couple of feet and be our seating area. We’ll have room for one on each side and two on the end.
Next they have to finish up trim work. Put in a bit more crown molding and then the trim all around things. This was partly why I didn’t write up this post last night. We had to meet with the contractor to discuss what we wanted for trim. That took way longer than expected. With us, we take forever to really decide on things. We usually need time to let ideas settle and percolate through our minds before we’re happy with them. What makes this doubly hard is all the existing woodwork in the foyer and family room don’t really match each other and now we’re adding more stuff that doesn’t quite match any of that. Dena is having a hard time deciding what to do. We know the shape of the trim, just don’t quite know the color yet. I’m sure she’ll come up with something we’ll be happy with.
Progress! Next the counter people come in and measure so they can go make our counters. They already warned us that would take about 2 weeks so we should be patient and expect a bit of a lull again in work. So stay tuned and I’ll keep this blog updated.
Now I’m really cheating. I’m writing this two days after the date on this post. But it’s not really cheating because the work happened 2 days ago and I’m just getting around to writing about it today. Eh, who cares. I’m writing.
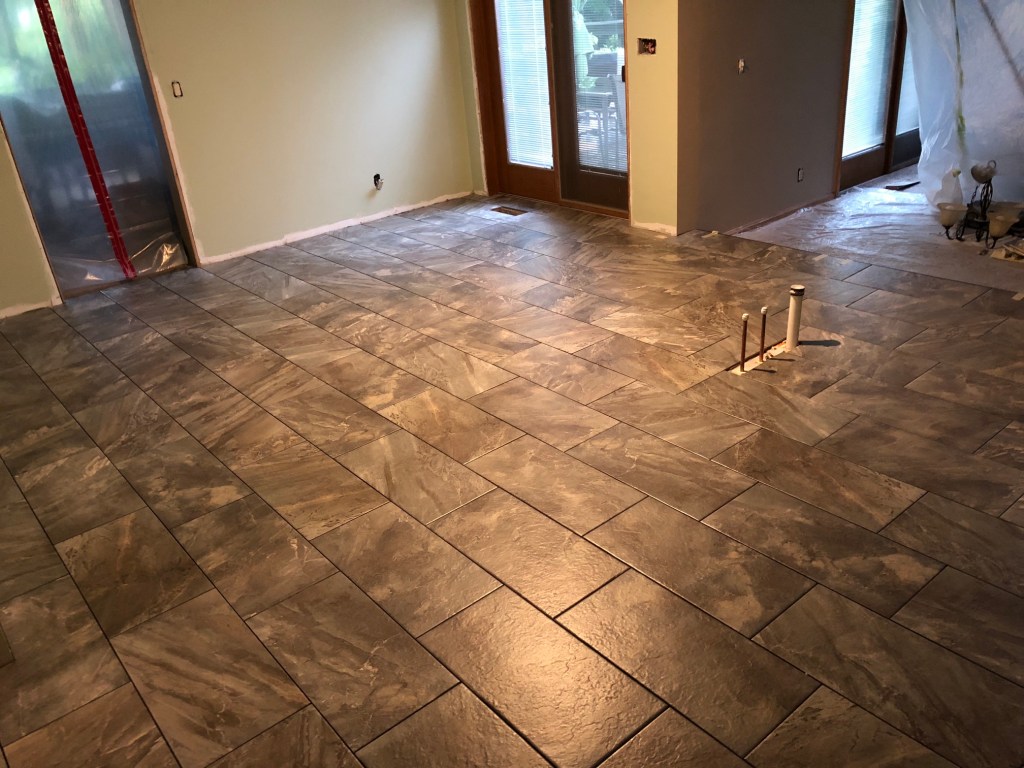
We had tile put in on Friday! Tile guys came, started at the far side of the kitchen and worked their way out the front door.
Here is the view from inside the kitchen.
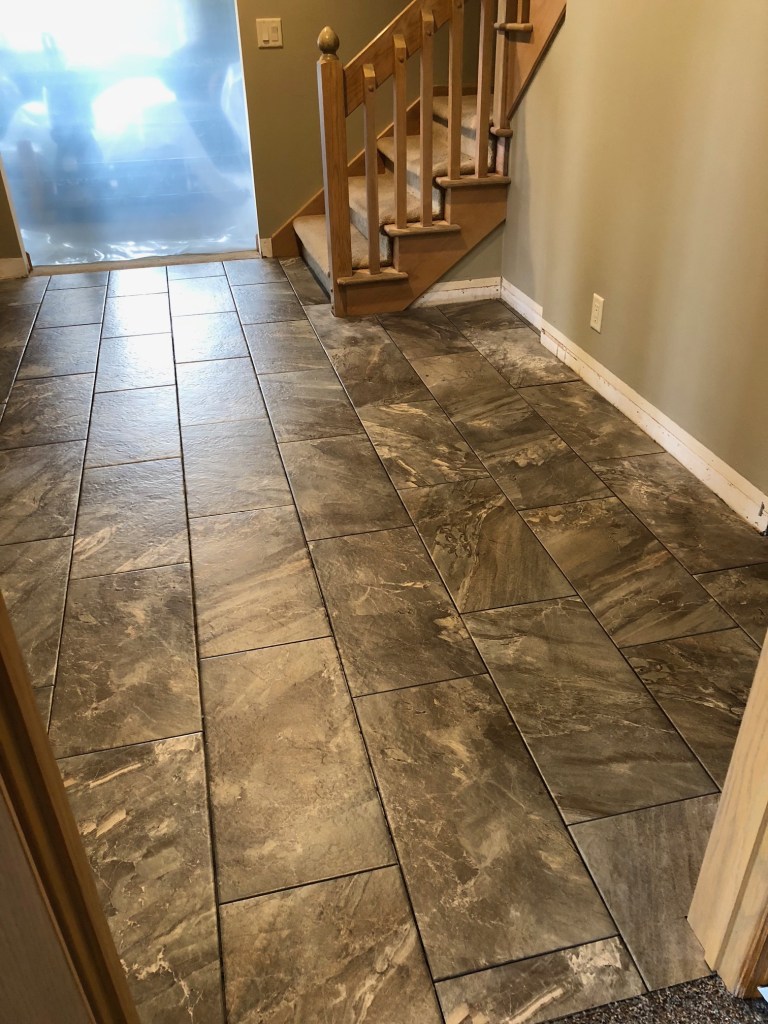
And the view from my office.
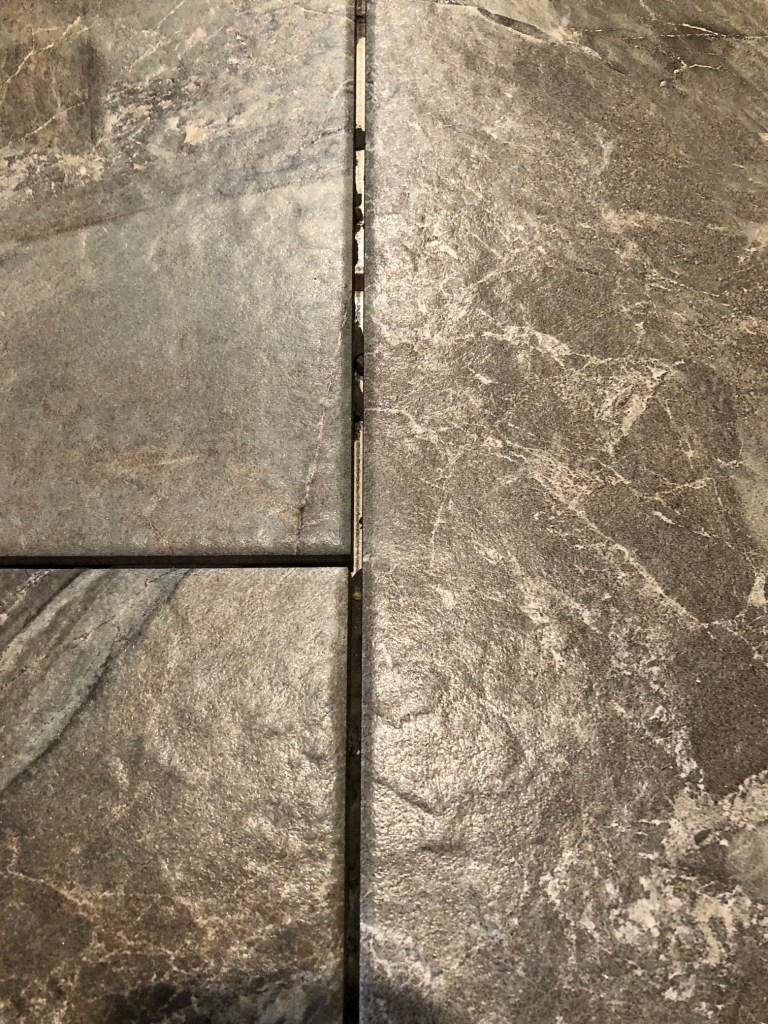
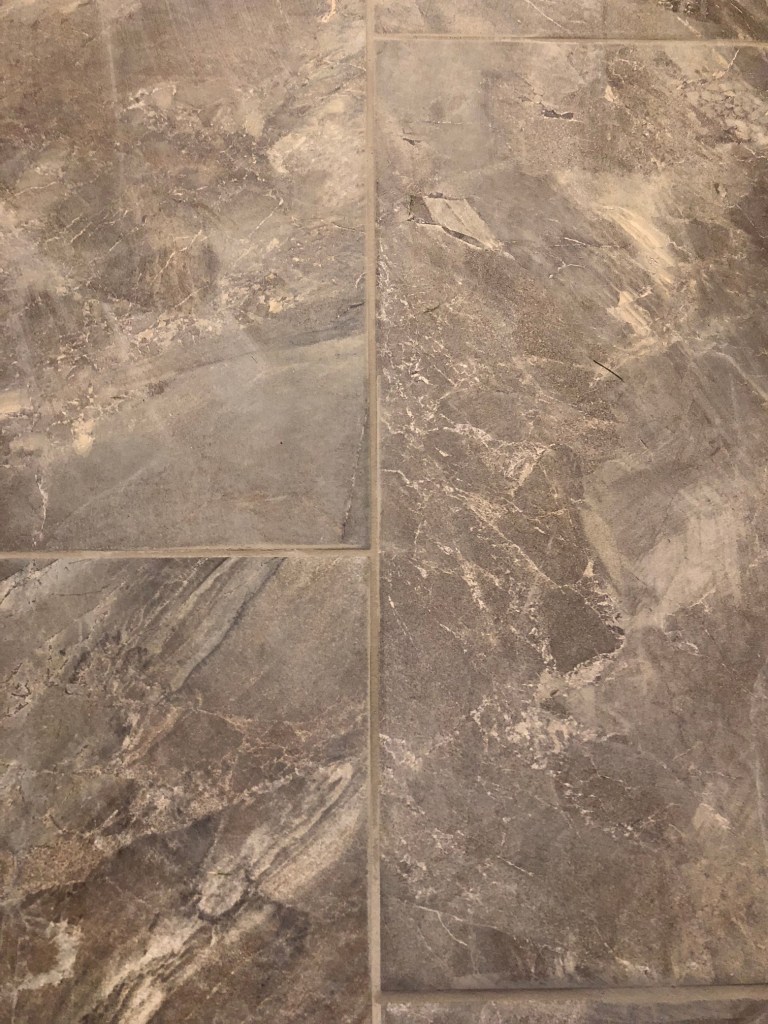
I’m gonna blame my iPhone camera but, in person, the colors I see don’t really look like those pics. But that’s OK because I think I’m getting used to the idea that colors in general change constantly over the course of the day. Dena & I have seen this time and again, we pick out some color that’s brown, or blue, or green or whatever. We get it on the wall and say, “Whoa! that’s not the color we thought it was.” And then later in the day when the sun has moved, “Yeah! That’s the color we wanted.” Even in the same room at the same time, one wall will look one color and another, perpendicular wall will look to be a completely different color. It’s strange.
Bringing it back to the tile. What we picked out was kind of a granity-green-ish. Now that it’s in, at different times and in different places, it looks more grey or more brown. Go figure. Regardless, we like it a lot. It’s all really starting to come together. Looks good with the walls in both the foyer and the kitchen and will go nicely with the cabinets once they’re in place. Which should happen Monday because the cabinets were delivered Friday as well!
Now for the adventure part of this blog post. As many people know, when tile is laid, you have to stay off it for about 24 hours to allow the thinset (mortar) to set properly. Othewise, the tiles will shift or may even break. Given that the foyer and kitchen are central to our house we planned to spend the night in a hotel.
So I’m sitting here in my office after the guys left waiting for Dena to come home, when I hear a noise like ductwork flexing. We all know that sound from TV with the good-guy crawling through the ducts to get the bad-guy. So I start hearing that sound and I think, “Oh shit”.
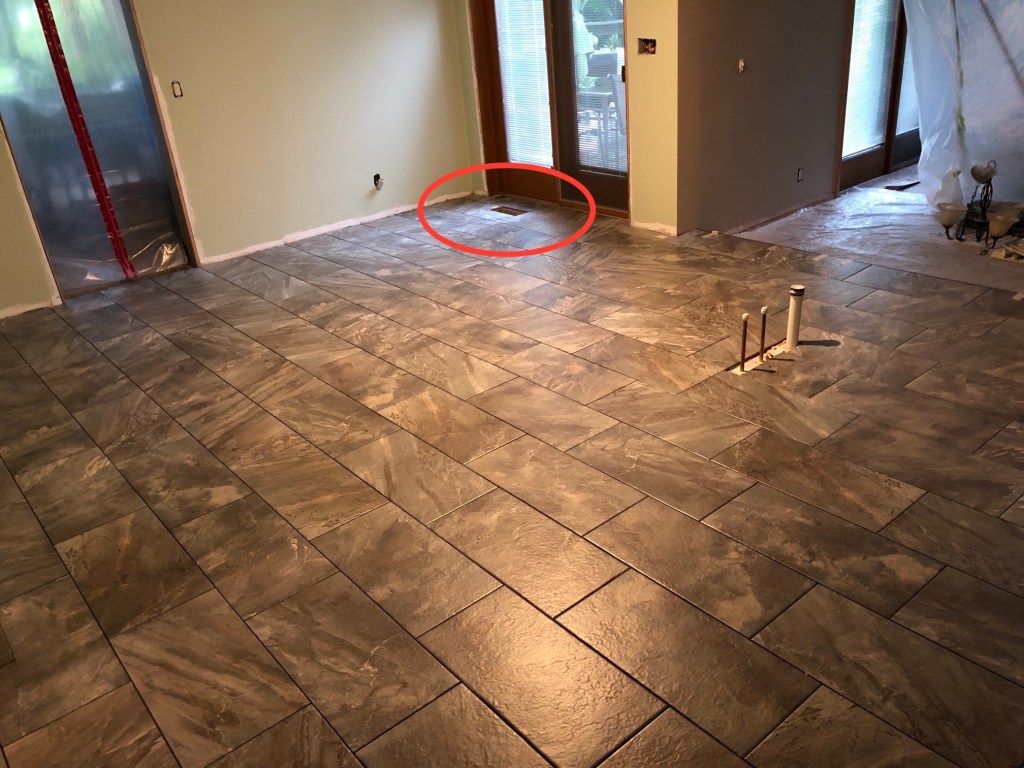
See that?
That little hole way off in the corner of the kitchen is a vent. Of course the vent cover was removed for the tiling and I don’t see Molly (our cat) around anywhere. I’m convinced she went down that vent hole.
See, it’s OK for cats to walk on newly laid tile. They aren’t generally heavy enough to affect it, it’s just us fat humans that can’t walk on it. So I think I have a cat stuck in the duct work and we’re supposed to be leaving for the night and all the next day. We can’t leave her to wander around the ducts for a day. She’ll starve!
So Jim rigs up a way to spider-man-it from my office door to the basement door without disturbing too many tiles. I get down there and start moving aside those drop-ceiling tiles we have down there to try to find the duct work to see if I can somehow poke a cat out of there. Then, of course, Dena calls down, “I have Molly!” She was never in there.
Stupid cat.
So we went to dinner and stayed in a hotel here in town. Stopped back Saturday morning to feed and check on the cats (no cats in the ducts), spent a nice day with Dena’s mom helping her get some shopping done, got back last night (still not cats in ducts) and could finally walk all over it.
That’s the end of our tile adventure. Cabinets were delivered late Friday and should be put in place come Monday. Gonna really start looking like a kitchen now.
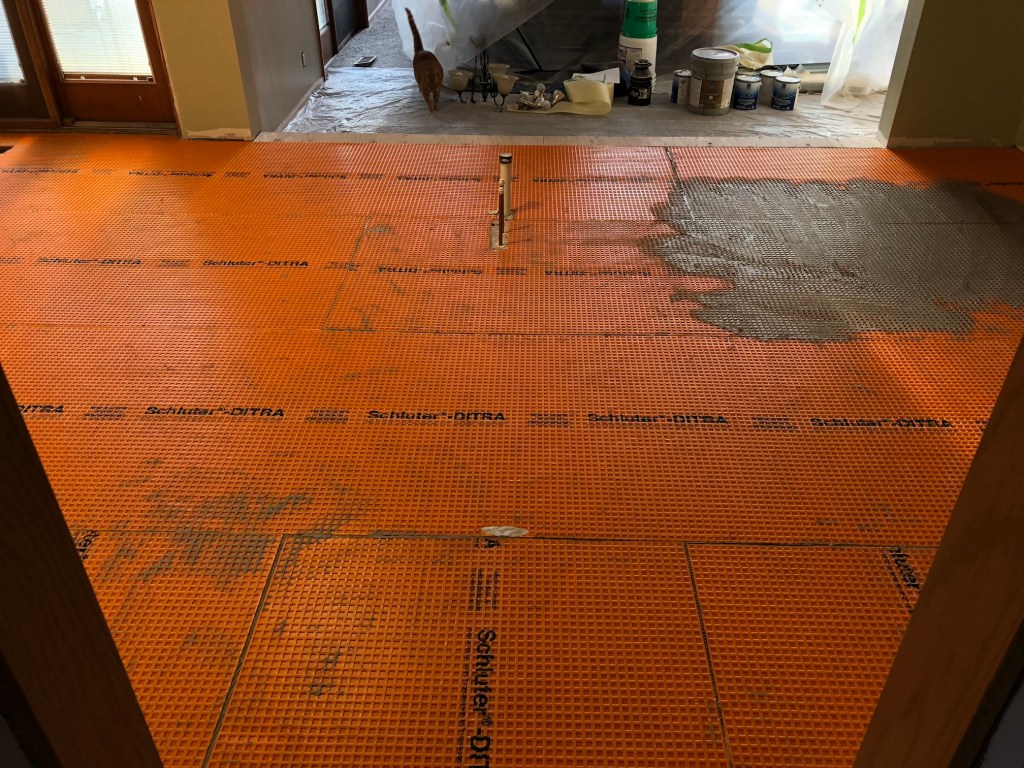
Tile guy came today. Bright and early, 7 a.m. there he was knocking on the door. Good thing I was up and showered and ready to go for the day already. Did mostly prep work and now we have orange flooring:
I had no idea what that stuff was or why it was on my floor. So I looked it up. Nice of Schluter to put their name so prominently on their product. Here is what they say it is:
Schluter®-DITRA is a polyethylene membrane with a grid structure of square cavities, each cut back in a dovetail configuration, and an anchoring fleece laminated to the underside. The anchoring fleece is embedded in thin-set mortar to provide a mechanical bond to the substrate. Tile is installed over DITRA using the thin-bed method in such a way that the mortar becomes mechanically anchored in the square, cutback cavities of the matting. Designed specifically for ceramic tile and dimension stone installations, DITRA serves as an uncoupling layer, waterproofing membrane, and vapor management layer that accommodates moisture from beneath the tile covering. Further, DITRA performs all these functions while still providing adequate support/load distribution for the tile covering. The combination of these four essential functions allows for the successful installation of tile over a wide range of substrates, including plywood/ OSB, concrete, gypsum, heated floors, etc.
So there you go. We have a plywood substrate in our kitchen so it seems to make sense use something like that to…oh hell, who am I kidding? I trust they know what they’re doing. I was just curious what that stuff was. I’m convinced by Schluter’s marketing.
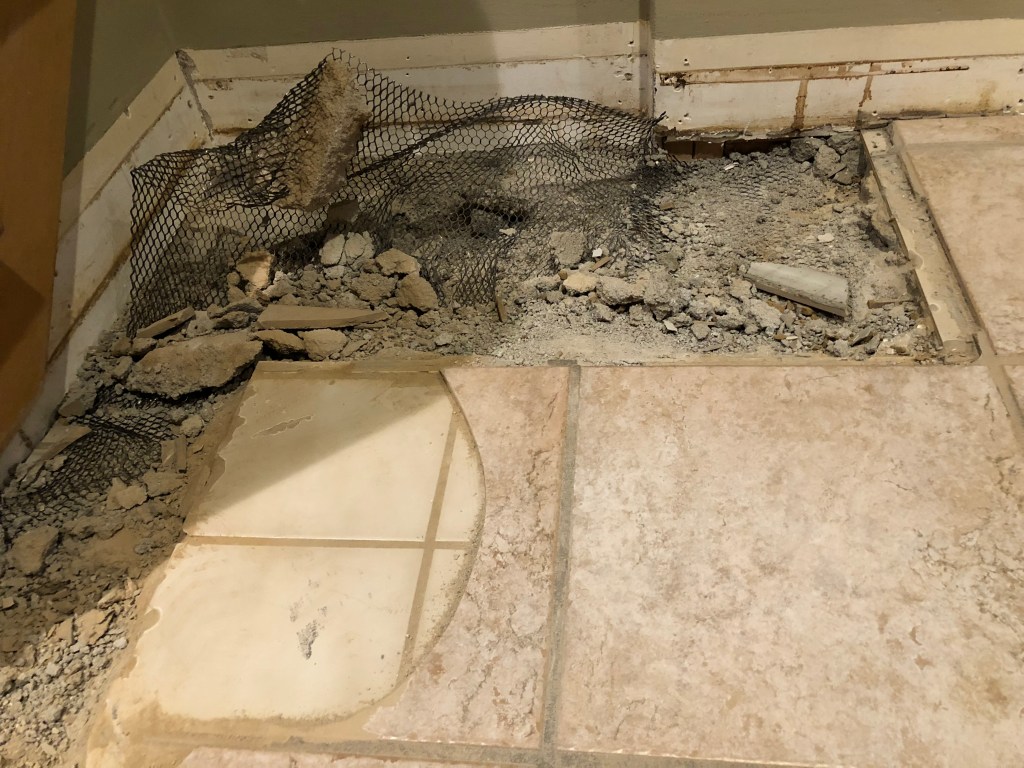
Anyway, remember this?
They started to tear up the floor in the foyer and discovered another layer of tile under the existing tile. They thought they were going to have to jack-hammer up the concrete underneath it all and then decided to just remove the top layer and tile over it. Well, the tile guy fixed that all up too.
All better now full of nice, new concrete (or whatever that stuff is).
He says tomorrow he’ll be able to tile the entire floor. That’s great news, except that means we have to go spend the night somewhere. Once the tile is laid, we’re supposed to stay off it entirely for at least 24 hours to allow it to set. Otherwise we could break some of the tile. Since the foyer and kitchen completely block off all access to just about all the rest of the house, we’re gonna go get a room for the night.
I’ll still try to get some pix before we take off and post something.
That’s it for today. Tune in next time for the further adventures of Jim & Dena’s kitchen.
I’m slacking again. Sure there were a couple of days of inaction lately and they’ve been working the last few days but the progress has been somewhat minimal and hard to show off.
They basically took this
And turned it into this
And then turned it into this
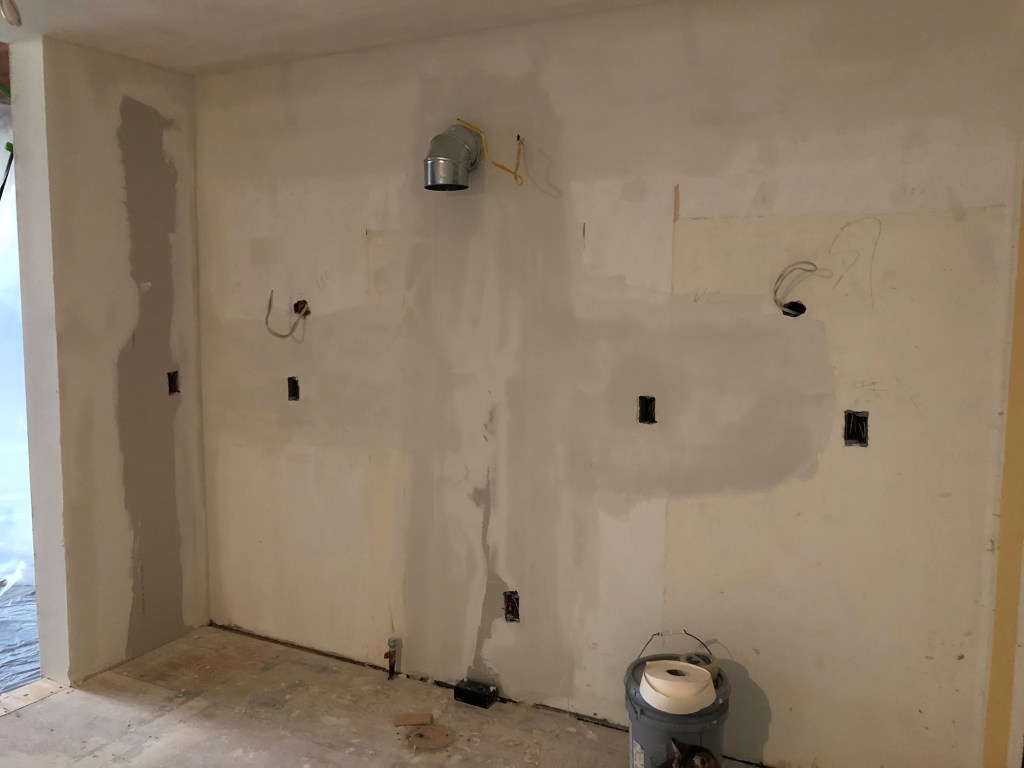
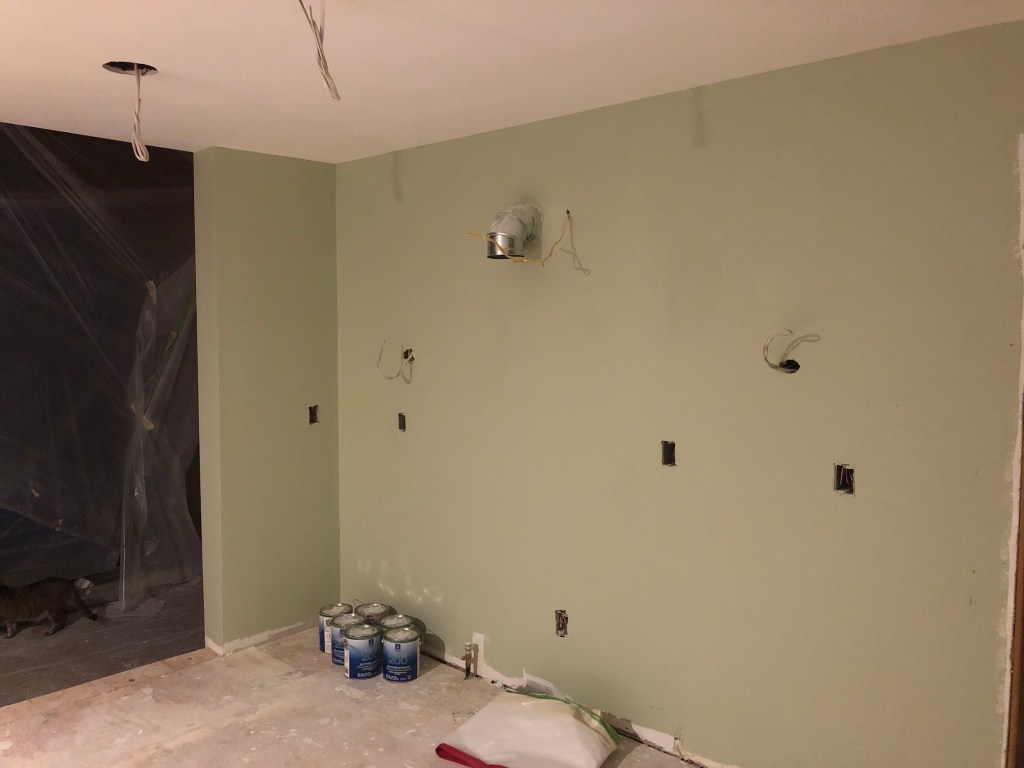
The drywallers have been here finishing up the walls and today the painters showed up and painted it all green. That’s going to be the color of the kitchen. Or at least, those parts of the walls you’ll actually be able to see. That wall there you really won’t see much of because it’ll have cabinets on top and bottom, a range and range hood in the middle (you can see the venting sticking out of the wall there) and a tile backsplash where you’d expect backsplash to be.
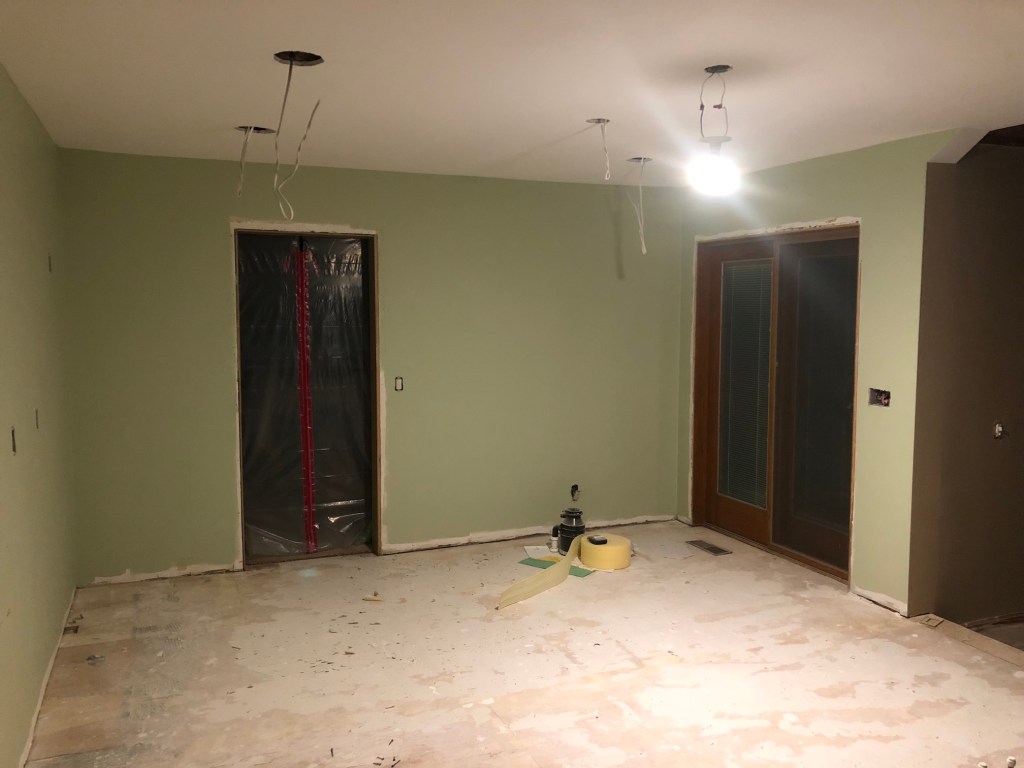
Here you’ll see more of the green:
This will be the dining area and that green wall is pretty much what you’ll see when this is all finished.
Still looks like they need to do another coat over the whole room. Then the tile guy is supposed to show up and start laying tile.
This is beginning to look like a real room for a change.
I’m always amazed at what professional plasterers can do. And how quickly they can do it.
I’ve done my own drywalling and hole-patching over the years. Having kids, and life in general means you have to patch walls on occasion. I get it done, but it always takes me like 47 rounds of spackling, sanding, spackling some more and it end up looking…OK. Occasionally I achieve “good”. But professionals, in one day the get that whole edge cleaned up and looking like a real wall.
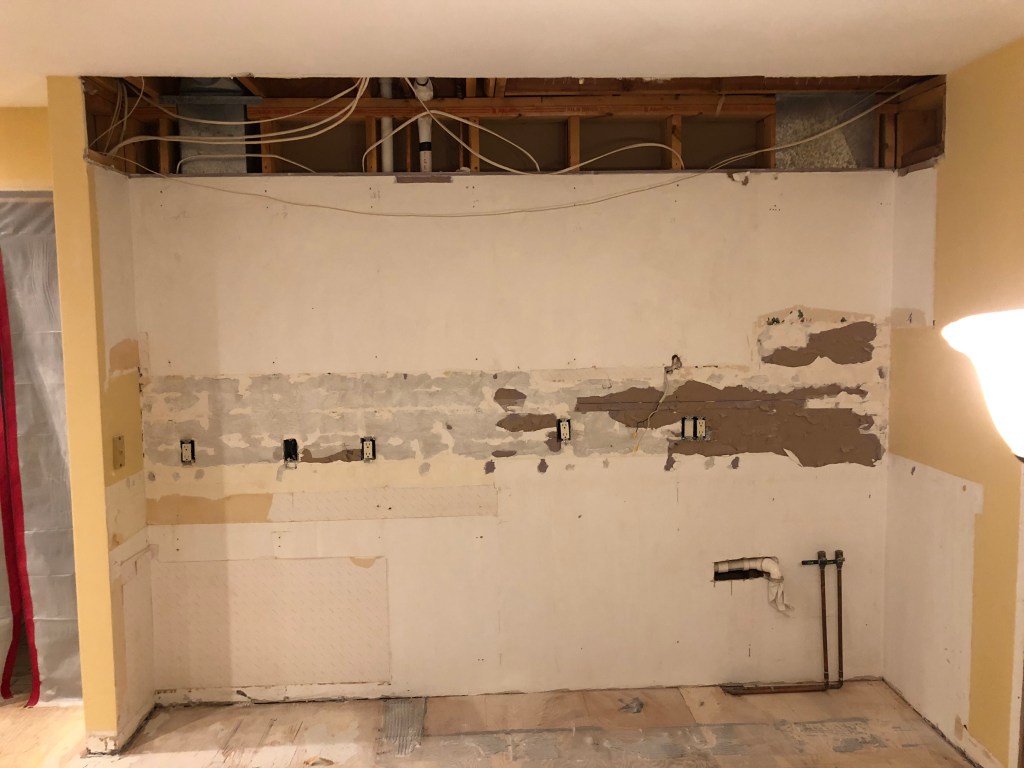
Then look at this. Here is before:
And now here it is after today:
That’s almost looking like a real wall. Not bad especially since almost that entire wall will be covered in cabinets.
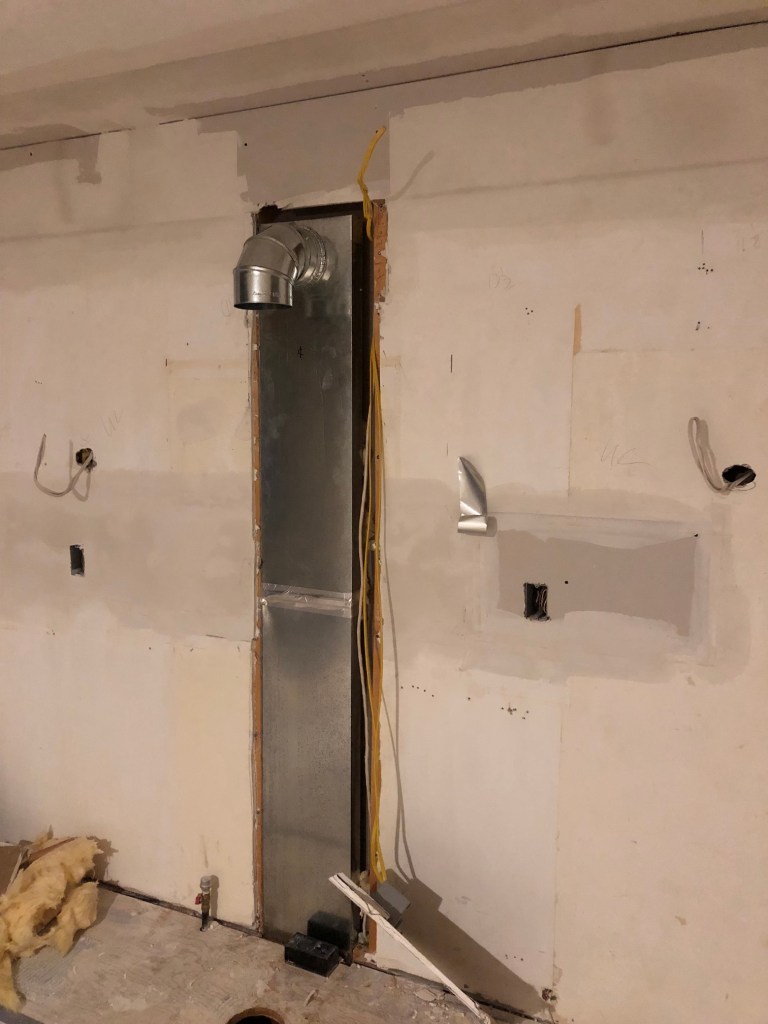
Then we also had some venting installed. You’d think they’d have done this before they put all the drywall up, but what do I know?
I think they had scheduling difficulty with the HVAC guy so they kinda had to do that. This is going to be where and how the range hood vents. They ended up having to go down with the venting rather than up like we had wanted them to. They say it’ll be OK. I’m not sure I’m convinced of that, though I’m not sure what else can be done at this point.
Finally a lesson learned that has nothing to do with the remodeling project.
If you’re ever out in your backyard smoking some ribs, and you have left-over apple cider and oil you’ve been using to spray on the ribs to keep them moist during smoking, don’t just toss the remaining cider on the lawn. It’s not just like water.
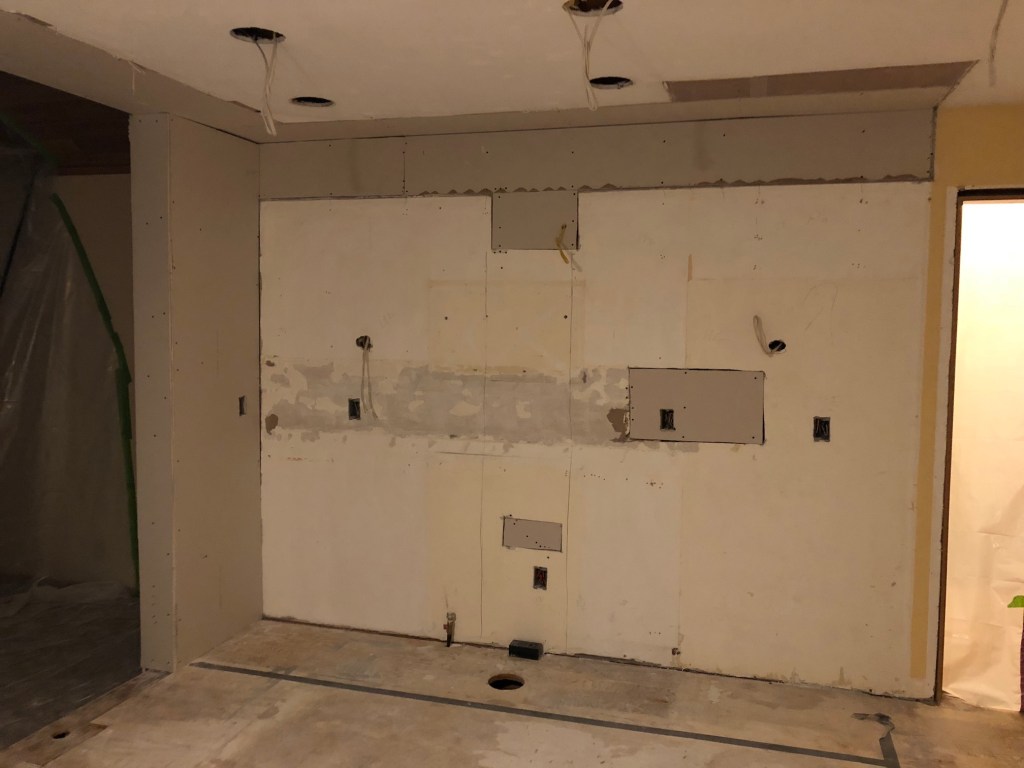
Today the dry wall people came and patched things up.
You can see they got the left-over wall all covered up. Patched up the holes in the walls and fixed up the ceiling.
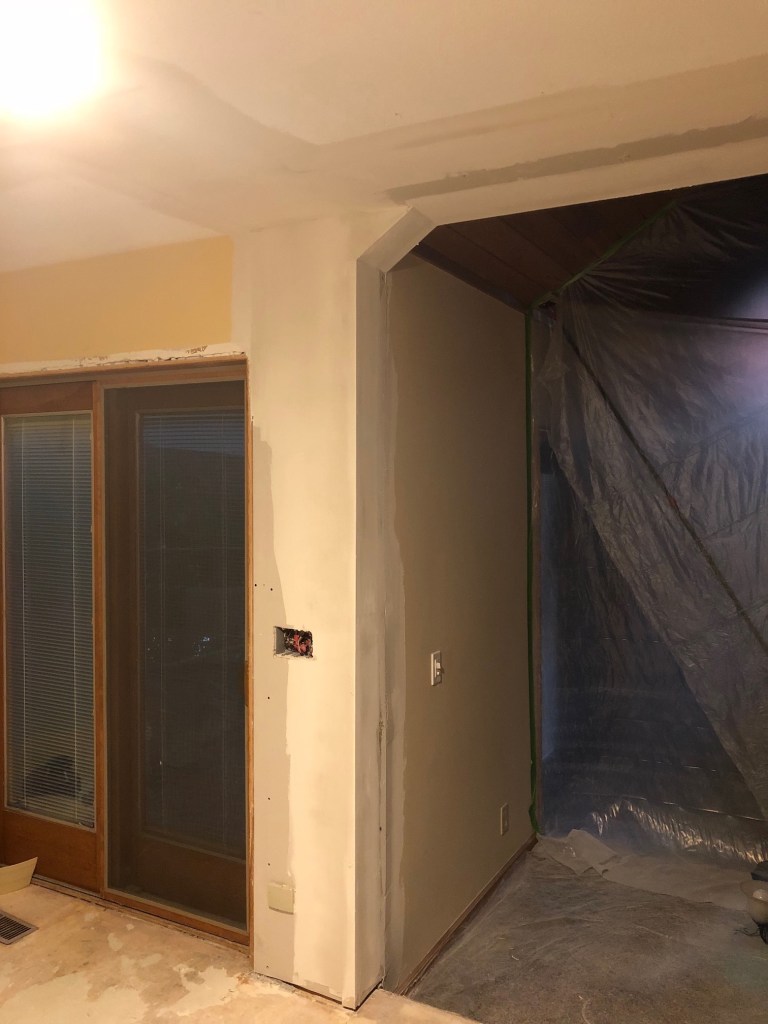
And over here is the other side of the opening to the family room. Guess we’ll have a little angle-thing in the corner there.
I cheated a bit. I know I said I’d blog every day someone was here doing something. Well, yesterday the electrician was back doing a couple more things. They put in one too many can-lights in the ceiling so he had to come back and remove the wiring for one of them. That was about it. Didn’t seem worth blogging about so I didn’t. Mea culpa.
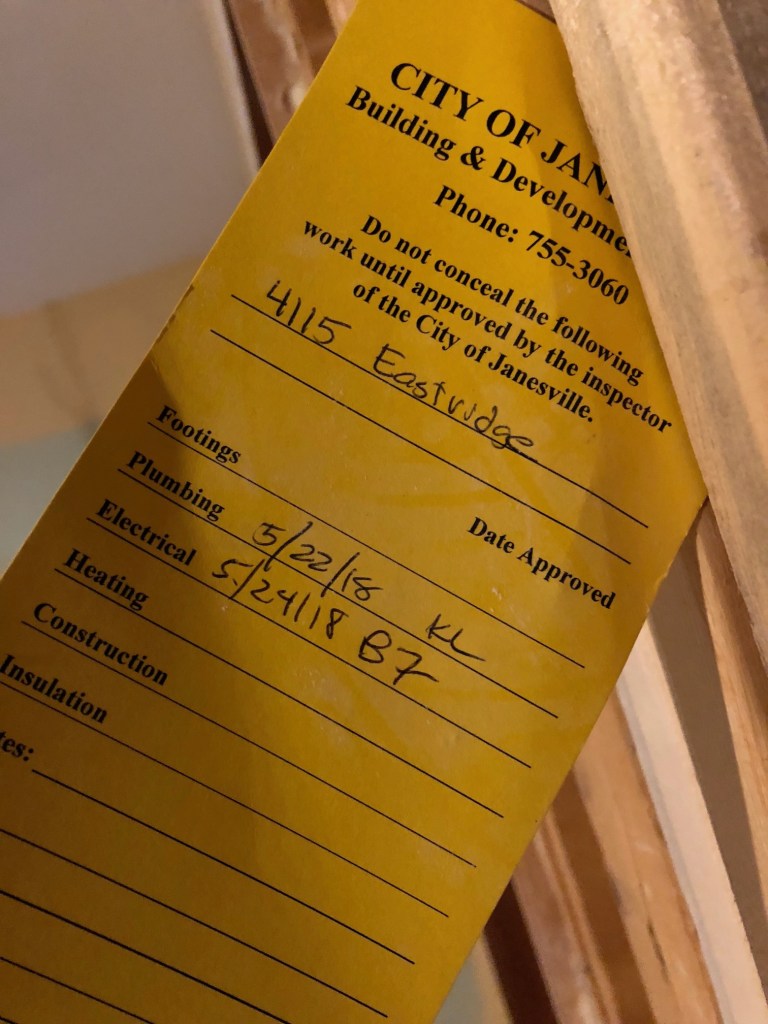
Guess the city of Janesville is satisfied with their work. Yep, that’s all that was done today.
JIm
p.s. I got to help my son change the spark plugs in his car. OK, he did all the work and I stood around and made fun of him. That’s kind of like helping.
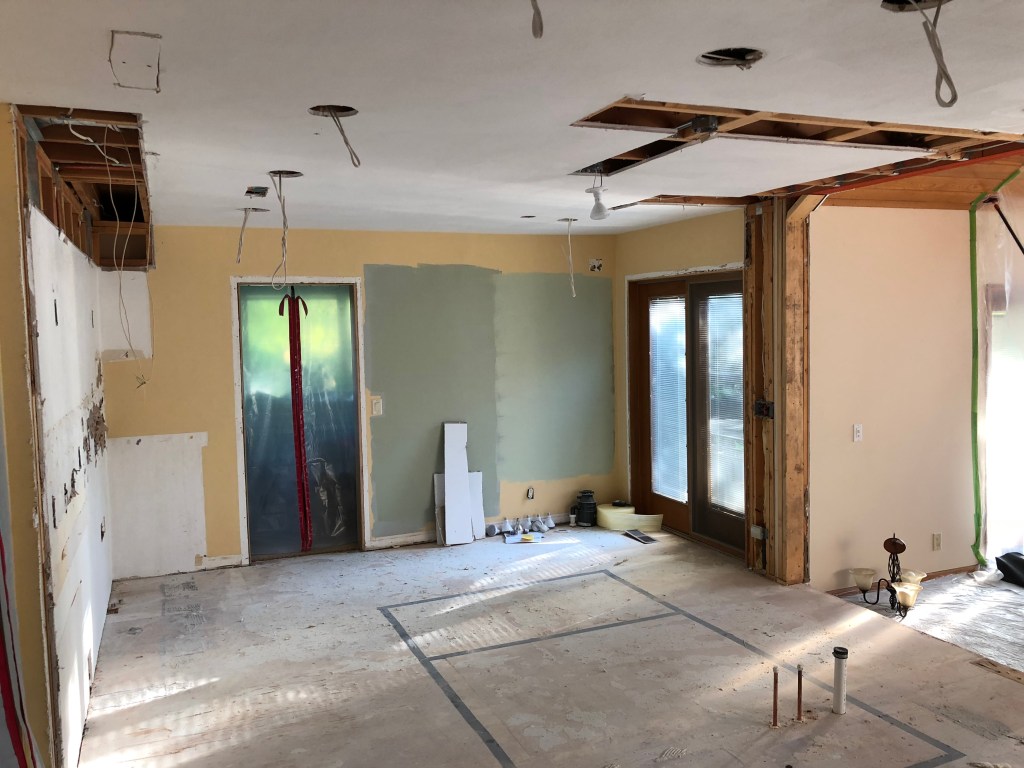
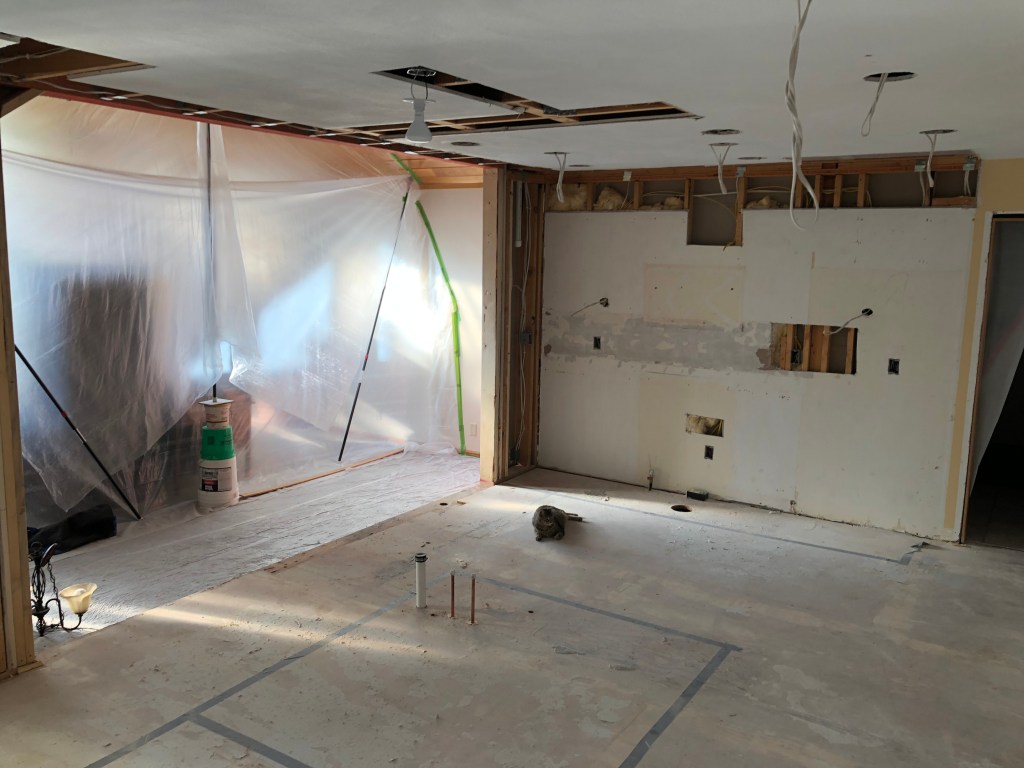
Today we got some electrical work done. How about that. Let’s look at a couple of views from the corners.
Each of those place where there are white wires hanging down out of holes in the ceiling is where can lights are supposed to go. Curiously, the plans called for 9 can lights to go into the ceiling. When I was speaking with Jerry a week or so ago I was questioning the need for 9 new can lights given that we’re supposed to have 3 pendants hanging over the island. He assured me we’d figure all that out when the electrician came and he’d make suggestions and we’d talk about it and I should not worry.
Now I got holes in the ceiling all wired up and I’m not quite sure I want them that way. And they never did talk with us about it beforehand. Is this normal for contractors? I also noticed there are only 2 pendants roughed in over the island where there’s supposed to be 3. Guess we have some talking to do. And probably a dreaded change order.
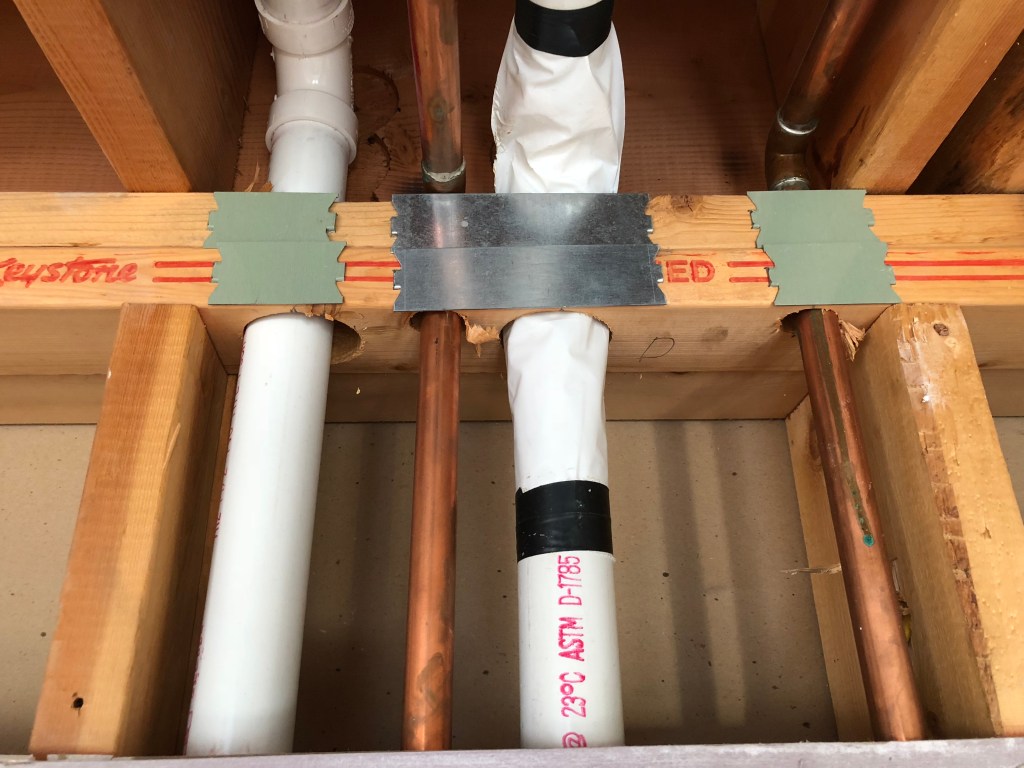
On the bright side, I figured out what “nailing plates” are. See these
Those are nailing plates. Imagine if you will, people hanging drywall with screws (or perhaps nails). They could easily drive that sucker right into the pipes. Hence, put in a nailing plate and that’ll stop any nails or screws from causing you a much bigger problem. I noticed we got a bunch of those nailed up all over the place where the wiring goes through the joists as well. Of course, if Wisconsin used conduit, they wouldn’t have to put in nailing plates to protect the wiring, but that’s a story for another day.
That brings us to the end of day 22. Hope you’ve been enjoying this. See you tomorrow.